Pages

Showing posts with label Art n Craft. Show all posts

Saturday, 4 February 2012

Our theme wall - Art with a bottle scrub


Our theme for this month is Space and Planets! 

I am still in the midst of preparing our wall. So this was our first project. Making the sign.

We started of with a piece of black paper.


Over a garbage bag. This one's gonna be messy!


But first, not without some interruption from Adik. Scooting off with the plastic, and what would take me just seconds to prepare, ended up in minutes of trying to catch her and coax her into giving it back. I have to admit defeat at last and cut another bag. 


Pasted the letters and some planets. If you notice the finished product, you might not see any planets at all. They actually became soggy from the paint and scrubbing and disappeared. So was the some of the letters actually, but I repainted them back with black markers.


Next, I prepared the colours, tempera paints diluted with a bit of water. And of course the bottle scrubs! 

Now the fun begins!


Spraying all the colours...even Adik was sprayed on to!


I told you its gonna be messy! But didn't Kakak look like she was having a blast! Adik was having lots of fun too! She even left her footprints on it. But since she was 'topless', no pics of her here.


After it dried a little, we put on some star glitters! Then I peeled off the letters.

But I had to make over it a bit, as some of the letters weren't visible as mentioned. We left it to dry overnight.


And when morning came, they were truly excited to see it pasted on the wall with the glow in the dark stars and planets. Alhamdulillah!

Linking up:

Pin It

Tuesday, 17 January 2012

Our skeleton craft!

Learning about skeletal system!


Materials used:
Cardboard for hands, feet, cranium and pelvis.
Tubes for other bones. Cut in halves vertically, except for 2, for the spine.
White chalk 
String


Cut out the pieces. Rub everything white with the chalk.


A hand and foot from Kakak's and another from Adik's.


The ribs.


Detailing the cranium. 


Start assemble. Punch hole accordingly and piece everything together with the string. 


For the clavicle, ribs and pelvis, make slits and slot in the pieces.


Trying to fit in the rib


All done! Notice the eyebrow and lashes. 


Apparently its a skeleton with two right feet.
Pin It

Tuesday, 10 January 2012

Face off and a Birthday cake

As we learn about face today, I cut out some facial features (eyes, noses, eyebrows, ears) from mags to do a little craft that will be put inside our "All about Me! booklet".

Items needed:
Cardboard cut as the face
Facial features from magazines
Glue
Yarn for hair

Glue, glue, glue!

Adik was helping making a mess


The face sure looks 'off'' and somewhat eerie..don't u think?! Even Adik would 'bap' (trying to smack it) if she sees it...but Kakak on the other hand adores it and kissed it several times! Well she did put in her heart doing it after all. I also printed some work for her, and instead of writing down the numbers (she is not so into writing, tracing and the likes), I asked her to cut and paste them! She loves it!

Next, we talk a little about her age. She only knows that she is four, but doesn't understand the concept yet. I intended to a montessori birthday walk someday. We will see when..

For now its just a simple tracing sheet, and pasting of cake and candles made of felt.

Pasting the 'choc cake'

Done!
Pin It

Thursday, 13 October 2011

Ocean themed crafts!

We spent the last few days creating crafts relating to our ocean theme as computer is down, so no printables. Some were borrowed ideas while some others were self-inspired. 

Tissue roll Anemone
This idea was borrowed. 


 Jellyfish
Self-inspired. Used a clear cake container and painted it with Artzooka's not-so-secret paint recipe for plastic. They dry clear.

Octopus
Self-inspired. Bunch up newspapers, cover with masking tape, paint then stick in pipe cleaners! Easy!

Ocean diorama


Fish out of bowl
I actually remembered this craft was done by my tutor when I was in my primary school. Ages ago! But he did a bird on one side and a cage in the other. So I just changed this to an empty bowl on one side, and a fish on the other. Stick the pictures face out together with a stick, we used a disposable chopstick. The trick is to spin the stick between your palm as fast as you can, and you can see that during the spinning it will look as if the fish is in the bowl! 

And we also did sensory tub!  
This was played during bath time. Once.
Some real shells, miniature ocean creatures erasers, stingray and lobster wind-up toys that swim, blue water, and some water beads. Note: There was an article in the paper that Malaysia has banned these water beads, as there were cases reported of kids swallowing them and had to undergo surgery! Be extra careful with them.
Of course I had to keep my eyes peeled, Adik was already getting ready to pop everything in her mouth!   

And when I got tired of keeping vigilant in the toilet, I tossed all the creatures in a big ziplock bag, squirted in lots of hair gel, and tadaa, a safer sensory bag! This idea was inspired by another mommy, but I'm truly sorry I coudn't find which. Chanced upon it quite some time ago. 
Pin It

Wednesday, 5 October 2011

A for angelfish


Current theme: Ocean!

Letter of the week: A 

Craft: Angelfish

From the letter 'a'

With her art supply and googled images of real angelfishes

Pasting fins and tail

Painted and done!

The paper plate fish was done much earlier. Now instead of pasting them on walls, which drove me crazy as they fell to the floor all time,  I hang them up as a mobile with fish line and clothespins. Makes the room look more interesting too! Don't you think?
Pin It

Thursday, 22 September 2011

Share good times and good art


I don't know why as of late I always have the cravings for: McDonald's!

Especially the breakfast, sausage mcmuffin with eggs! Yummy!

Thank you to Abah who took pain and time ~well not really right, because its just near your golfing driving range and you were willing just so I wouldn't get mad at you and your yet-another hobby~  to buy them, as we do not have the luxury of home delivery ~thank God for that actually~ and its about 15-20 mins away.

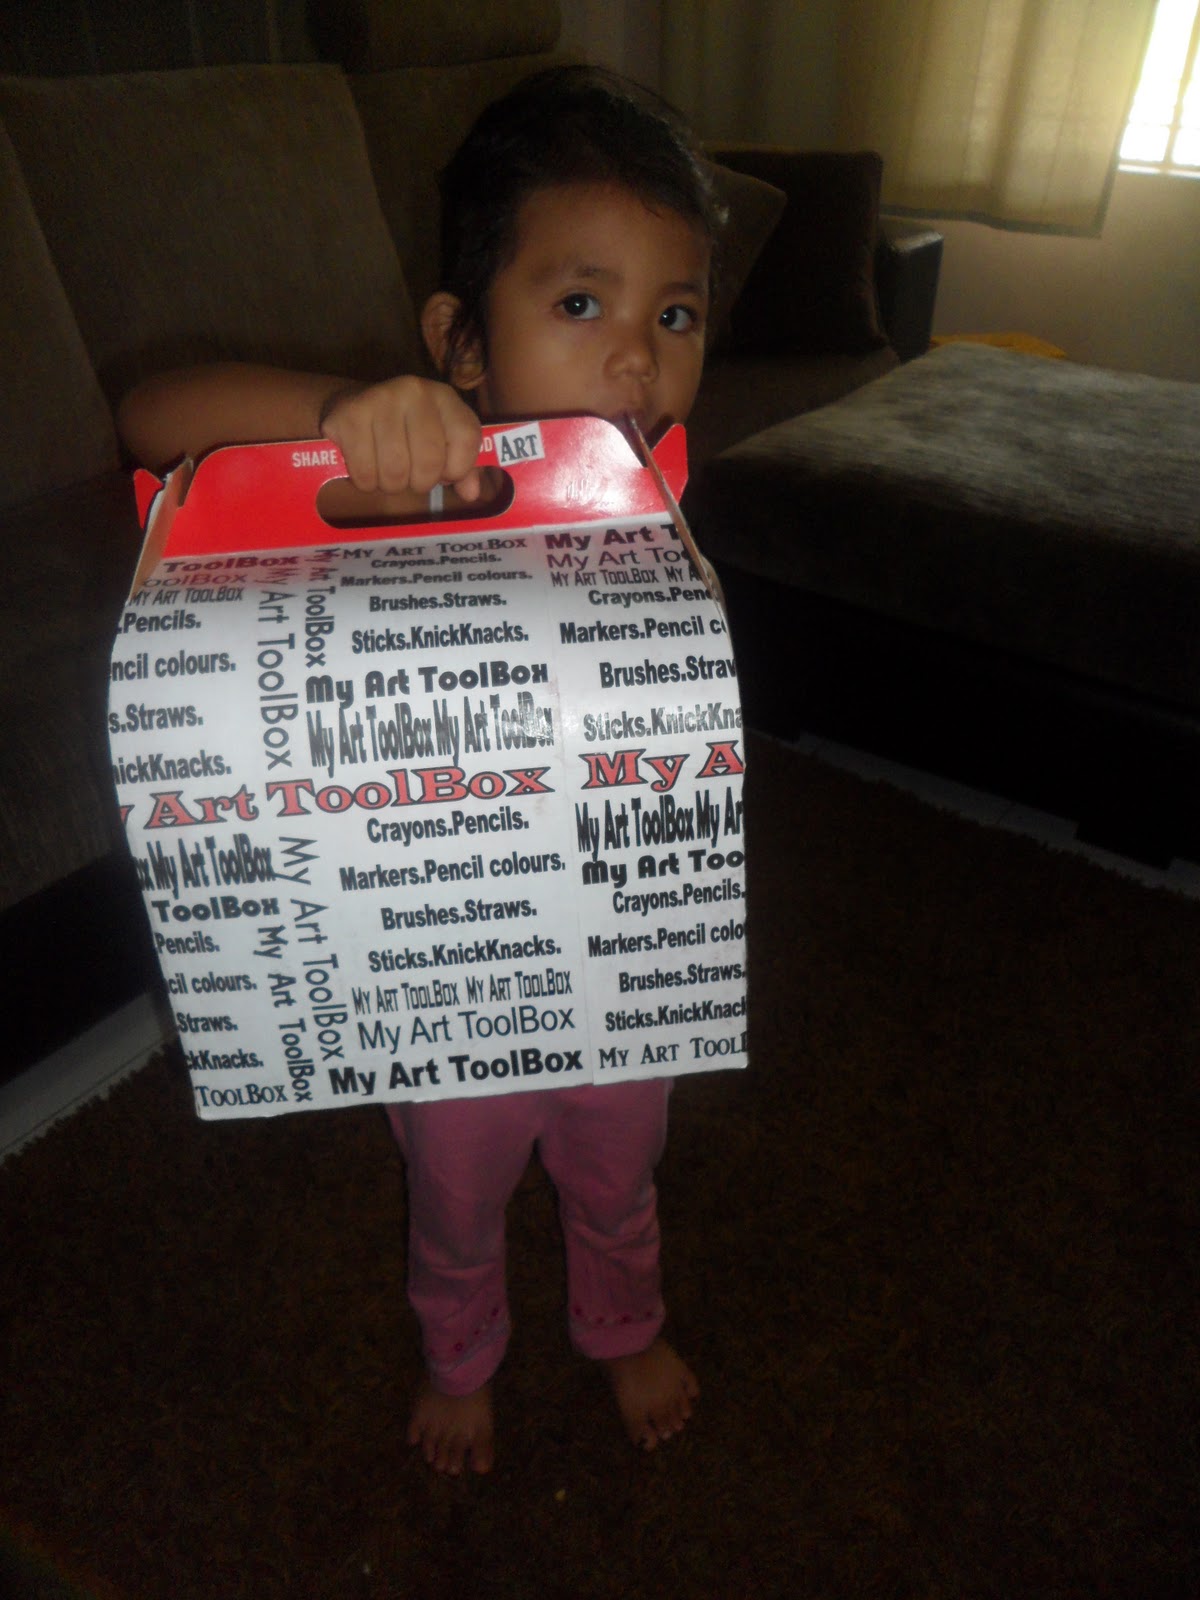
So if you are a McDonald's lover like me, you might actually already owned their Breakfast/Dinner Box. I think its just awesome and the ways you can use them afterwards, superb!

So this is what I made mine into:

Hahah! A box for Kakak's art tools! 

the ' I can't be bothered with my Mama' look


Some of her art supplies 

Pencil Colours

Pencils, Brushes, Pipe cleaners, Straws, Chopsticks, Crayons etc..

The poster paint box can be fitted in nicely too!
So now, I do have a good reason to go and buy more boxes! Pin It

Thursday, 11 August 2011

#7 JFF: Egg Carton Flower!


I have come to a point where I would think twice before throwing anything away, especially containers and cardboard materials. This actually resulted in a cramped box full of egg cartons, cereal boxes, plastic bottles, nutella jars and so on. I am not even sure what's in there now. Time to get organized soon!

So when I chanced upon an easy craft that makes use any of them, I jumped right in!

Found this idea from a lovely sister Amnah. She's a Muslim mom living in San Francisco, check out her site! Her pictures are awesome! Oh boy I really need my camera! Not that I take beautiful pictures, but at least it should be better than my pictures now - cloudy and blurry, even editing doesn't help.

Anyway I did mine as a bouquet in a plastic bottle while sis Amnah did hers as a wreath. And while hers are very pretty and colourful, mine looks like wilting flowers..but I am ok with that! At least Kakak put in her effort! Love you dear!


Materials used:
Egg Carton
Scissors / Penknife
Paint
Brush/Sponge
Bendable coloured straws - ours are from IKEA

For the vase:
Plastic bottle - cut out the top
Gel balls - usually put in an aquarium. We love this! Should be great for a sensory tub!
Water


Cut the egg cartons as shown in pictures. After cutting ours, I found that it will be much better if the slits are cut not till the middle part, leave like half an inch. That will help the 'petals' from opening too wide which is not very nice. You may then colour the flowers.  


To stick in the straws, poke a tiny hole in the middle of the flower. Slide in the straw, arrange them in your 'vase' and DONE!
Pin It

LinkWithin

Related Posts Plugin for WordPress, Blogger...